Handling error : java jre7 lib ext qtjava.zip was unexpected at this time

Tags

\Java\jre7\lib\ext\QTJava.zip was unexpected at this time. Process exited.

After installation of Weblogic Server if you get an error: “\Java\jre6\lib\ext\QTJava.zip was unexpected at this time.” This can be solved as under,

Check if QTJava.zip is set in %CLASSPATH% environment variable CLASSPATH=.;C:\Program Files (x86)\QuickTime\QTSystem\QTJava.zip

Remove C:\Program Files (x86)\QuickTime\QTSystem\QTJava.zip from %CLASSPATH% environment variable and restart the computer.


It works . 🙂

JAVA Concurrent Program

Tags

, , ,

Today I ‘ll will explain how to develop JAVA Concurrent Program on JDeveloper and I’ll show you to make an simple program, you can check it out on your local PC.

JAVA Concurrent Program

Requirements:

1- JDeveloper I will prefer to develop JAVA Concurrent on JDeveloper 10.1.3.3.0

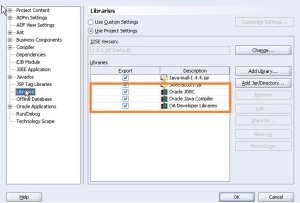
libraries

2- SSH Tools such as Putty , FillaZilla …

You may decide to dump that into $JAVA_TOP/xxpc/oracle/apps/xxpc/sftp

You need to connect the application server that’s why to add your classes where you decided the path. Path should be like xxpc.oracle.apps.xxpc.(your_folder_name).

3- Linux know-how to built-in SHELL SCRİPT

To need some shell Scripts I will show how to write it, how to get return code on JAVA.

I’ll show how to execute on Java to Sh?

4- To need Two Application Server for Secure Data Transfer

What’s my purpose to sample Project?

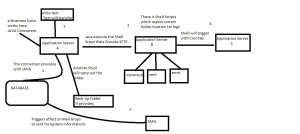
I will improve Secure File Transfer(SFTP) on application server to another one. This process will start from JAVA Concurrent on Oracle E-Business Suite

Lets check it the Sample SFTP Project

Architecture on the picture

Architect

Below this method provides how to Connect the Database with JAVA Concurrent

Main Class Continue reading

HOW TO CREATE USER WITH PL/SQL SCRIPT- (fnd_users)

DECLARE
P_USER_NAME VARCHAR2 (200) := ‘TESTUSER’;
P_OWNER VARCHAR2 (200) := NULL;
P_UNENCRYPTED_PASSWORD VARCHAR2 (200) := ‘TESTUSER’;
P_SESSION_NUMBER NUMBER := USERENV (‘sessionid’);
P_START_DATE DATE := SYSDATE;
P_END_DATE DATE := NULL;
P_LAST_LOGON_DATE DATE := NULL;
P_DESCRIPTION VARCHAR2 (200) := ‘teamsearch’;
P_PASSWORD_DATE DATE := SYSDATE – 1;
P_PASSWORD_ACCESSES_LEFT NUMBER := 1000;
P_PASSWORD_LIFESPAN_ACCESSES NUMBER := 1000;
P_PASSWORD_LIFESPAN_DAYS NUMBER := 1000;
P_EMPLOYEE_ID NUMBER := NULL;
P_EMAIL_ADDRESS VARCHAR2 (200) := NULL;
P_FAX VARCHAR2 (200) := NULL;
P_CUSTOMER_ID NUMBER := NULL;
P_SUPPLIER_ID NUMBER := NULL;

v_user_id NUMBER;
BEGIN
FND_USER_PKG.CREATEUSER (
x_USER_NAME => P_USER_NAME,
x_OWNER => P_OWNER,
x_UNENCRYPTED_PASSWORD => P_UNENCRYPTED_PASSWORD,
x_SESSION_NUMBER => P_SESSION_NUMBER,
x_START_DATE => P_START_DATE,
x_END_DATE => P_END_DATE,
x_LAST_LOGON_DATE => P_LAST_LOGON_DATE,
x_DESCRIPTION => P_DESCRIPTION,
x_PASSWORD_DATE => P_PASSWORD_DATE,
x_PASSWORD_ACCESSES_LEFT => P_PASSWORD_ACCESSES_LEFT,
x_PASSWORD_LIFESPAN_ACCESSES => P_PASSWORD_LIFESPAN_ACCESSES,
x_PASSWORD_LIFESPAN_DAYS => P_PASSWORD_LIFESPAN_DAYS,
x_EMPLOYEE_ID => P_EMPLOYEE_ID,
x_EMAIL_ADDRESS => P_EMAIL_ADDRESS,
x_FAX => P_FAX,
x_CUSTOMER_ID => P_CUSTOMER_ID,
x_SUPPLIER_ID => P_SUPPLIER_ID);

SELECT user_id
INTO v_user_id
FROM fnd_user
WHERE user_name = P_USER_NAME;

DBMS_OUTPUT.PUT_LINE (‘User_id : ‘ || v_user_id);
EXCEPTION
WHEN OTHERS
THEN
DBMS_OUTPUT.put_line (‘Error while creating a user: ‘ || SQLERRM);
END;

select * from fnd_user
where 1=1
and user_name like ‘TESTUSER’  –Check it out again

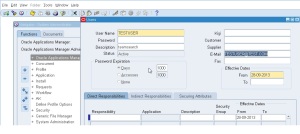
Second Way to create user in following steps:

System Administrator >> Users

ERP_01

How to Change Your Linux Hostname Without Rebooting

Tags

,

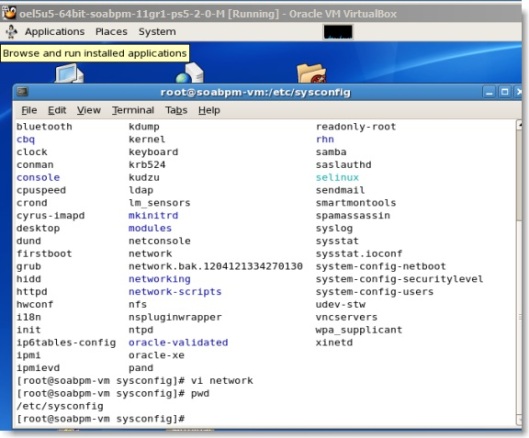
First, you must change the config file that controls this. The actual file and its location will vary across distributions. In the Redhat derivatives, the file to modify is /etc/sysconfig/network so vi this file and change the line that reads HOSTNAME=

From this:

Untitled

How to Change VNC password:

change VNC command:

vncpasswd – change the VNC password


vncserver -kill :display#

Getting Started On Your Linux Desktop

Tags

, ,

if you have logged in from the graphical login screen, the graphical desktop will be started automatically for you. The graphical desktop presents a Graphical User Interface (GUI) for the user to interact with the system and run applications. If you have used the text-based screen login, you will have to start the graphical desktop manually by entering the command startx followed by the ENTER key.

Thats all:)

Create user with sqlplus

Tags

, , , ,

How can I add a new user as sudoer using the command line?

sudo adduser <username> sudo

This works because /etc/sudoers is pre-configured to grant permissions to all members of this group (You should not have to make any changes to this):

# Allow members of group sudo to execute any command
%sudo   ALL=(ALL:ALL) ALL

----------------------------------------------------------------------------------

Today I forget my XE password then I follow on these steps to figure out it.

SQL> CREATE USER <username>
IDENTIFIED BY <password>
DEFAULT TABLESPACE

TEMPORARY TABLESPACE
;
PROFILE <profile_name>;

SQL> GRANT CREATE SESSION TO <username>
GRANT RESOURCE TO <username>

Problem :
ORA-28009 connection as SYS should be as SYSDBA or SYSOPER

Solution:

If you want to bypass the SYSDBA or SYSOPER checking step then there is a way .

1. Log in to sqlplus as sys

i.e use the following command in sql prompt
conn / as sysdba

2. Check for parameter named O7_DICTIONARY_ACCESSIBILITY
i.e use the following command in sql prompt
show parameter O7_DICTIONARY_ACCESSIBILITY

It will give you result as shown below
NAME TYPE VALUE
———————————— ———– ——————————
O7_DICTIONARY_ACCESSIBILITY boolean FALSE

3. Change this parameter using
alter system set O7_dictionary_accessibility=TRUE scope=spfile;

4. It is a static parameter so need to bounce the database . Restart your database .
5. Now connect as SYS without SYSDBA privilege.
conn sys/

it will be successful .

Changing Permissions With Numbers

Write || Read || Execute

-rw-rw-r–
Each permission setting can be represented by a numerical value:

r = 4

w = 2

x = 1

– = 0

When these values are added together, the total is used to set specific permissions.

For sneakers.txt, here are the numerical permissions settings:

– (rw-) (rw-) (r–)
| | |
4+2+0 4+2+0 4+0+0

Beware 666 and 777

Setting permissions to 666 or 777 will allow everyone to read and write to a file or directory. These permissions could allow tampering with sensitive files, so in general, it is not a good idea to use these settings.

Here is a list of some common settings, numerical values and their meanings:

-rw——- (600) — Only the owner has read and write permissions.

-rw-r–r– (644) — Only the owner has read and write permissions; the group and others can read only.

-rwx—— (700) — Only the owner has read, write and execute permissions.

-rwxr-xr-x (755) — The owner has read, write and execute permissions; the group and others can only read and execute.

-rwx–x–x (711) — The owner has read, write and execute permissions; the group and others can only execute.

-rw-rw-rw- (666) — Everyone can read and write to the file. (Be careful with these permissions.)

-rwxrwxrwx (777) — Everyone can read, write and execute. (Again, this permissions setting can be hazardous.)

Here are some common settings for directories:

drwx—— (700) — Only the user can read, write in this directory.

drwxr-xr-x (755) — Everyone can read the directory, but its contents can only be changed by the user.

File Compression and Archiving with Gzip, Zip, and Tar

Compressing with Gzip and Zip

Deploying a simple Java EE 6 war into WebLogic 10.3.3 fails with <Unable to load descriptor

WebLogicHata

Problem :

cvc-enumeration-valid: string value ‘3.0’ is not a valid enumeration value for web-app-versionType in namespacehttp://java.sun.com/xml/ns/javaee:<null>

Solution :

Change your Web.xml like these;

<?xml version=”1.0″ encoding=”UTF-8″?>
<web-app version=”2.5″ xmlns=”http://java.sun.com/xml/ns/javaee&#8221; xmlns:xsi=”http://www.w3.org/2001/XMLSchema-instance&#8221; xsi:schemaLocation=”http://java.sun.com/xml/ns/javaee http://java.sun.com/xml/ns/javaee/web-app_2_5.xsd”&gt;
<session-config>
<session-timeout>
30
</session-timeout>
</session-config>
<welcome-file-list>
<welcome-file>index.jsp</welcome-file>
</welcome-file-list>
</web-app>

That’s all:)